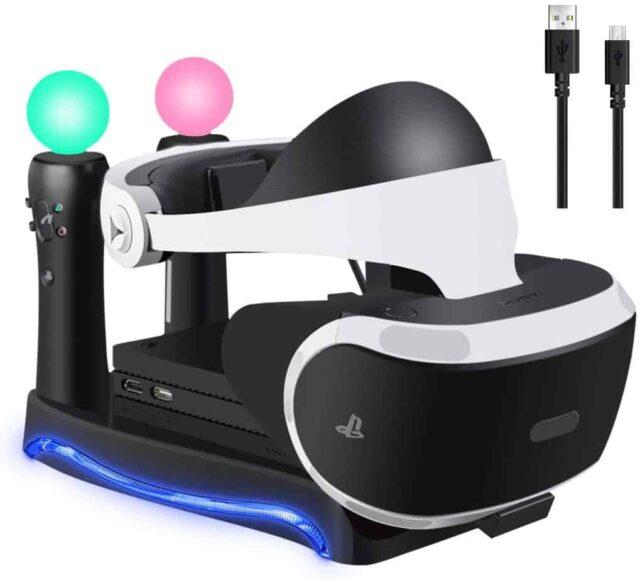
To find all the calibration settings, you will need to press the PS button on your controller, then navigate to the Settings tab in the XMB menu, then select the Playstation VR option.
It will offer calibration options for you to choose from depending on the issue you need to fix, or if you are unsure what is wrong with the calibration you can follow our simple steps for each issue to fix calibration.
Measure the distance of your eyes
This setting is used to make the 3D video you see in your headset look as realistic as possible and look natural when you look around. Go to “Measure eye-to-eye distance”.
Remove the headset and move your face into the frame on the screen and look straight ahead at the camera and press the X button on your controller to take the shot.
Then with the cursors on the screen, place each one in the center of the eyes then validate. The distance will then automatically adjust and the things you see in the video will look more natural and help you perceive the scale of the world you see inside the VR.
Try to do this step as precisely as possible, as it can make a huge difference in your experience.
Adjust the positioning of your helmet
You can't play VR if your headset isn't comfortable and you can't see clearly, so take the time to adjust your headset to fit you perfectly. This setting will take you to a black screen with white text on it, make sure you can read it and it's not blurry.
Make sure the headset headband is snug but not too tight on your head and not so loose that it falls off as you move around during gameplay.
Adjust your Playstation camera

The camera adjustment setting will ask you to center your face in 3 individual frames going from left to right. Make sure your face fills the screen frame/
The best distance between a player and the VR camera is around 6 meters, so make sure there is enough space between you and the TV.
You should also have at least 6 feet of space on either side of you so that you can reach all of the game elements without hitting any obstacles or injuring yourself.
The camera should be high enough (above your television level with your chest is recommended) with the lens pointing slightly towards your chest.
Make sure both camera lenses are clean and if they have any smudges, and use a soft, dry microfiber cloth to wipe off the marks.
Once you have configured and adjusted your camera to your positioning, do not move it as you will need to readjust it again. Make sure the camera is stable on a surface and will not fall during in-game movement, as this will cause tracking failure.
Calibrate the tracking lights on your VR headset
Calibrating your tracking lights on your VR headset is the most important part to ensure the best VR experience. The best way to do this is to put the headset on instead of holding it in front of the camera to fill in the tracking lights in the red frames.
Follow all on-screen instructions and try to stay as still as possible during the calibration each time, otherwise the calibration will be reset for the set you just calibrated. There will be 5 different sets of lights to calibrate.
You can do this process with the helmet in your hands, but if you're a fairly shaky person, you'll have a hard time keeping it still in the frames of each set.
You'll need to make sure your room is dimly lit throughout the gameplay process so your camera can follow the lights on the VR headset. If the room is too bright, it may not be able to properly recognize your movements and ruin your gaming experience.
If the lighting in the room changes during gameplay, it should be able to readjust, but you may need to recalibrate it to get it back to working as it was.
Final steps
Now that you've successfully calibrated your PS VR, you need to complete the final steps of adjusting your brightness and screen to what works best for you while gaming.
The VR screen has maximum brightness by default, but if you want to dim the brightness in the calibration menu for PS VR, select “screen brightness” and adjust it according to your eyesight.
Under the screen brightness tab you will find the screen size option which will adjust the size of the screen inside your headset. You can choose between small, medium or large depending on what you prefer as a field of vision.
The medium size is good for watching videos while the large is good for playing games, although sometimes you may feel like you're doing too much head movement and shifting your weight a bit more when you have the wide screen, which can sometimes be less tiring than standing still all the time.
360 Caméra Vidéo Market Size & Share 2022 – Global Business Review, Key Findings, Forecast by Regions, Growth Strategy, Developing Technologies, Trends and Company Profiles – Sphericam Inc, Panono, Bubl, Samsung – athleduweb.be
Yubico unveils its security key with fingerprint reader
5 Bonnes Raisons d’Acheter La Huawei Watch Fit Special Edition Noir
Comment Utiliser le Honor Magic 6 Lite et MagicOS 7.2 : Combinaison Parfaite de Technologie et D'humanité